
ZPL is used in very different workflows: inspecting a label, converting or printing batches, processing files from scripts, automating incoming files, or adding ZPL rendering to another application. fCoder provides dedicated tools for these jobs: Labeloid, DocuFreezer, Print Conductor, FolderMill, 2PDF, 2JPEG, 2TIFF, 2Printer, and fCoder ZPL rendering engine.
Which ZPL software fits your task?
There is no single best ZPL tool for every task. A desktop viewer fits inspection and editing, batch applications help operators process many files, command-line tools fit scripts, and Hot Folder software handles unattended jobs.
ZPL Tool Selector
Which ZPL software fits your task?
Tell us what you need to do and how the process should run. We’ll recommend one tool and explain why it fits.
No email or sign-up required. Answer up to three questions and see your recommendation immediately.
Question 1 of 3
What do you need to do with ZPL?
Choose one option, then select Next.
Compare fCoder ZPL tools
We have collected a number of popular tasks related to ZPL files, and by checking this table, you can select the tool that best matches your needs.
| Feature |  FolderMill FolderMill |  Print Conductor Print Conductor |  Labeloid Labeloid |  DocuFreezer DocuFreezer |  2Printer 2Printer |  Command-line converters Command-line converters |
|---|---|---|---|---|---|---|
| Review and editing | ||||||
| View rendered ZPL | Labeloid✔ | |||||
| Edit ZPL source | Labeloid✔ | |||||
| Print after visual check | Print Conductor✔ | Labeloid✔ | ||||
| Conversion | ||||||
| Single-file conversion | FolderMill✔ | Labeloid✔ | DocuFreezer✔ | Command-line converters✔ | ||
| Manual batch conversion | DocuFreezer✔ | |||||
| Command-line conversion | Command-line converters✔ | |||||
| Printing and automation | ||||||
| Single-file printing | FolderMill✔ | Print Conductor✔ | Labeloid✔ | 2Printer✔ | ||
| Manual batch printing | FolderMill✔ | Print Conductor✔ | ||||
| Command-line printing | 2Printer✔ | |||||
| Automatic folder conversion | FolderMill✔ | |||||
| Automatic folder printing | FolderMill✔ | |||||
FolderMill — automate incoming ZPL files
Choose where incoming files arrive
Define what happens to each ZPL file
Combine processing and routing rules
Create separate Hot Folders for different tasks
Run and monitor the workflow
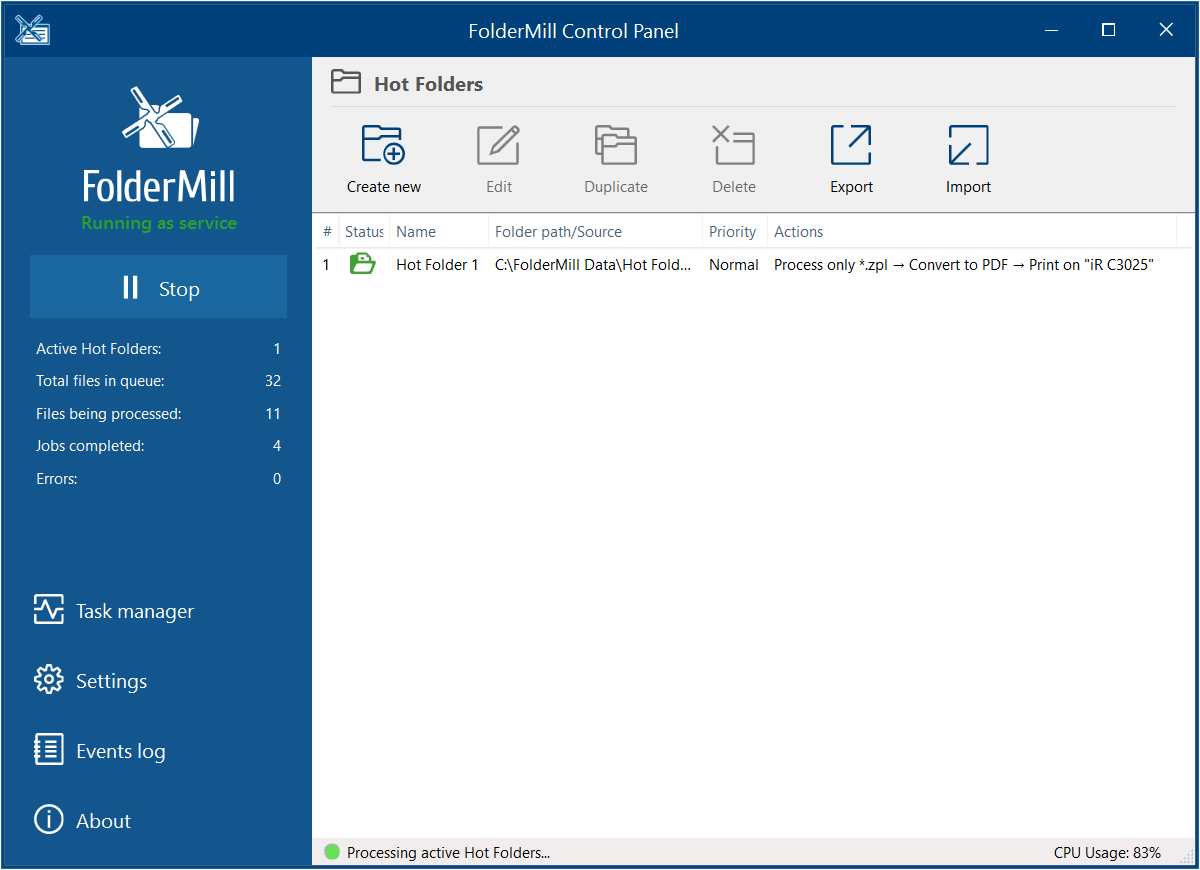
FolderMill automates ZPL processing through Hot Folders. It watches configured sources (Hot Folders) and starts the assigned Actions when a new file arrives, allowing the workflow to continue without an operator opening the application or manually starting each batch.
1. Choose where incoming files arrive
Use a local or network folder, an FTP, FTPS, or SFTP location, or an email mailbox as the source. A shared Hot Folder allows colleagues to submit files without installing FolderMill or accessing its interface.
2. Define what happens to each ZPL file
Add Actions that convert incoming ZPL files to PDF, PNG, JPEG, or TIFF, or send them to a configured printer. Output can be saved to a folder, printed, emailed, or uploaded to an FTP or HTTP destination.
3. Combine processing and routing rules
Run several Actions in sequence. For example, FolderMill can filter incoming files, convert them, add a watermark, rename or route the results, print a copy, and move the source file to a processed location.
Rules can also direct files to different printers or destinations based on their filename, file type, page size, page count, color, or content.
4. Create separate Hot Folders for different tasks
Each Hot Folder can represent a complete workflow. One may convert ZPL labels to PDF for an archive, another may create JPEG previews, and a third may print incoming labels to a particular printer or tray.
From the end user’s perspective, choosing a workflow can be as simple as placing the file in the corresponding shared folder.
5. Run and monitor the workflow
FolderMill can operate in application mode or as a Windows service. Its Task Manager and logs show processing status, while email alerts can notify an administrator when an error occurs.
After the initial setup, the saved rules continue to process new files in the background on a workstation or server.
With FolderMill, the configuration is reusable and centralized. When a printer, output folder, or processing requirement changes, the administrator updates the relevant Hot Folder instead of asking every colleague to change a desktop routine.
For recurring ZPL work, this removes the manual start step entirely. The saved rules continue to run in the background, while status information and logs provide a way to check what happened to each file.
Why choose FolderMill for ZPLChoose it when file arrival should trigger conversion or printing automatically, especially for recurring, shared, or unattended workflows that need consistent rules and job tracking.
Print Conductor — batch-print ZPL from a Windows interface
Add and arrange the files
Combine ZPL with other file types if needed
Select the printer
Configure the batch or individual files
Start and monitor the print job
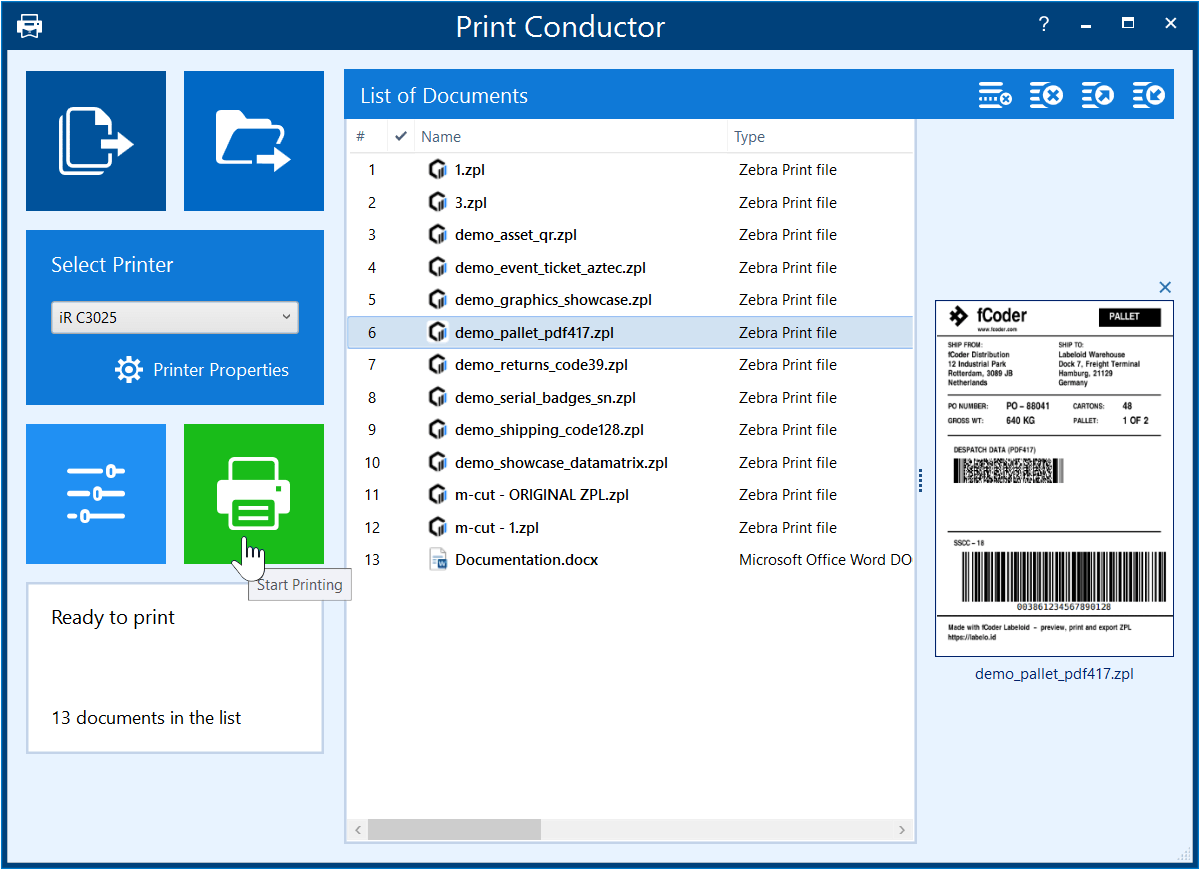
Print Conductor gives you a visible Windows workspace for batch printing ZPL files. Add the files to the List of Documents, select a printer, review the order and settings, and print out the entire batch without opening every file separately.
1. Add and arrange the files
Add individual ZPL files, drag and drop them into the application, import an entire folder, or load files from supported RAR, ZIP, and 7ZIP archives. You can include subfolders, filter by file type, remove unwanted items, and arrange the files in the required print order.
For recurring jobs, you can save the List of Documents and load it again later.
2. Combine ZPL with other file types if needed
The same print list can contain ZPL labels together with PDFs, office documents, drawings, text files, and images. This is useful when a shipping or production batch includes both labels and the documents that accompany them.
3. Select the printer
Choose any compatible printer installed in Windows, including a local, network, or virtual printer. Print Conductor can work with office printers, multifunction devices, plotters, barcode printers, and other devices recognized by Windows as printers.
4. Configure the batch or individual files
Apply common settings to the entire list or assign different settings to selected files. Available options include the number of copies, page range, printer tray, duplex mode, color mode, orientation, and scaling.
5. Start and monitor the print job
Review the list, then select Start Printing. Print Conductor shows the progress of the batch in one interface and can generate a report when the job is complete.
Tip: Before printing the entire batch, preview each ZPL file in the preview pane. To enable it, go to Settings → Advanced → User interface and turn on Show preview pane.
This is a manual-start workflow: you can see what will be printed and decide when to begin. It is a practical fit when people need control over the current batch but do not want to open and print every ZPL file separately.
Why choose Print Conductor for ZPLChoose it when you need to prepare and control a multi-file print job through a familiar graphical interface, especially when the batch also contains non-ZPL files.
Labeloid — preview, edit, and export existing ZPL
Open and preview ZPL labels
Edit ZPL code and redraw the label
Identify potential issues in ZPL code
Browse though pages of multi-label ZPL files
Print or save as PDF or images
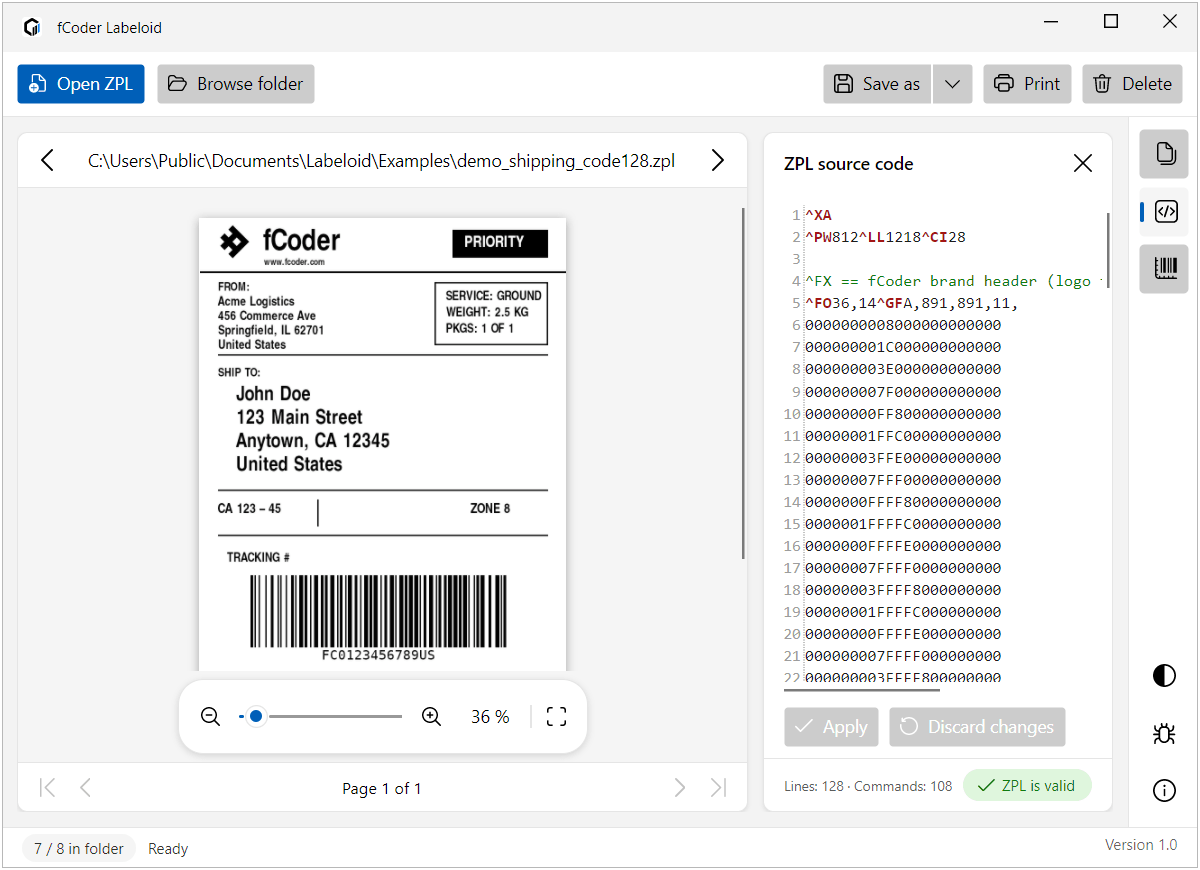
Labeloid is a Windows desktop application for opening and working with existing ZPL files. It keeps the rendered label and raw ZPL source in one workspace, so you can check what the file contains before you export it or send it to a printer.
The source panel uses syntax highlighting, while the preview shows the result produced by the renderer.
No web upload is required for ZPL viewing and rendering.
1. Open and preview ZPL labels
Open an individual ZPL file, browse a folder containing multiple labels in the folder navigation pane, or drag and drop files into the application. Use the arrow keys to move quickly between files.
Zoom in on the rendered label to inspect small text, barcodes, and element placement — all without switching between a separate text editor and an online viewer.
2. Edit ZPL code and redraw the label
Edit the ZPL source code, then select Apply to save your changes and redraw the label. Selecting a specific area in the label preview highlights the corresponding ZPL code, making it easier to locate and modify individual elements.
3. Identify potential issues in ZPL code
Labeloid also reports rendering warnings. They can provide a practical starting point when the output does not look right. These warnings can identify unrecognized content, invalid numeric values, unsupported font references, and fields that were trimmed because they were too long.
4. Browse though pages of multi-label ZPL files
Multi-label files open as a sequence of pages. Move through the labels one by one, inspect the source code behind each rendered result, and keep the complete file together. This is useful for ZPL generated by warehouse, shipping, or business systems that produce multiple labels in a single file.
5. Print or save as PDF or images
After checking the result, print the labels directly from the application or export them as PDF, PNG, or JPEG. A multi-label ZPL file can be saved as a multi-page PDF, while PNG and JPEG export creates a separate numbered image file for each page.
Labeloid runs locally on Windows 10 and 11 x64. It does not require administrator rights for regular use, and it is free for personal and commercial use. This makes it suitable both for an occasional label check and for a workstation where ZPL files need to be reviewed every day.
Why choose Labeloid for ZPLChoose it when visual verification is part of the job: you need to see the rendered label, inspect or correct the source, review warnings, and only then create an output file or print.
DocuFreezer — batch-convert ZPL in a Windows app
Add the files you want to convert
Choose an output format and folder
Set the ZPL label dimensions and resolution
Configure the output if needed
Start the batch conversion
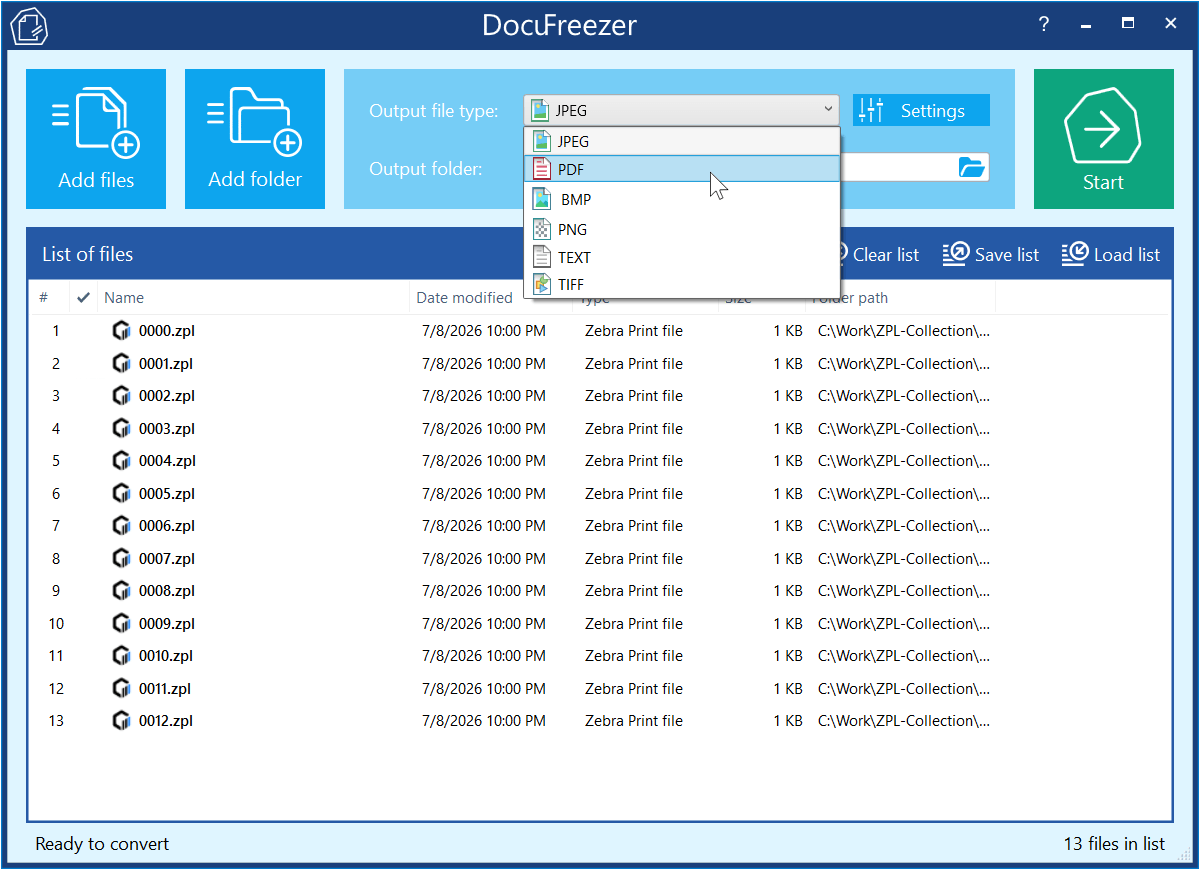
DocuFreezer handles batch conversion through a simple list-based interface. Add ZPL files to the list, select PDF, PNG, JPEG, or TIFF as the output, adjust the required settings, and start the complete batch from one window.
1. Add the files you want to convert
Add individual ZPL files, import an entire folder, or drag and drop files into the application. DocuFreezer can also process files from RAR, ZIP, and 7ZIP archives. The same conversion list can contain ZPL files alongside other supported document and image formats.
2. Choose an output format and folder
Select PDF, PNG, JPEG, or TIFF, then specify where the converted files should be saved.
3. Set the ZPL label dimensions and resolution
If the default values do not match your labels, adjust the label width, height, and print density (DPMM, density per millimeter). Available density settings include 152, 203, 300, and 600 DPI.
4. Configure the output if needed
For more specific requirements, select a page range, change image resolution or quality, customize output filenames, or choose how multipage PDF and TIFF files should be created. The available settings depend on the selected output format.
5. Start the batch conversion
Review the file list and select Start. DocuFreezer processes the files in the order shown and displays the status of each item. For recurring jobs, you can save the file list and load it again later. Optional post-processing rules can also copy, move, or delete source files after conversion.
DocuFreezer is available for Windows 11, 10, and 8.1. A trial version lets you evaluate the program before selecting a commercial license for business use.
Why choose DocuFreezer for ZPLChoose it when you need to convert many ZPL files together, want a graphical interface, and prefer to review the file list and settings before each batch starts.
2Printer — print ZPL from the command line or scripts
Specify the source and printer
Configure the batch print job
Keep the batch in the required order
Reuse or automate the command
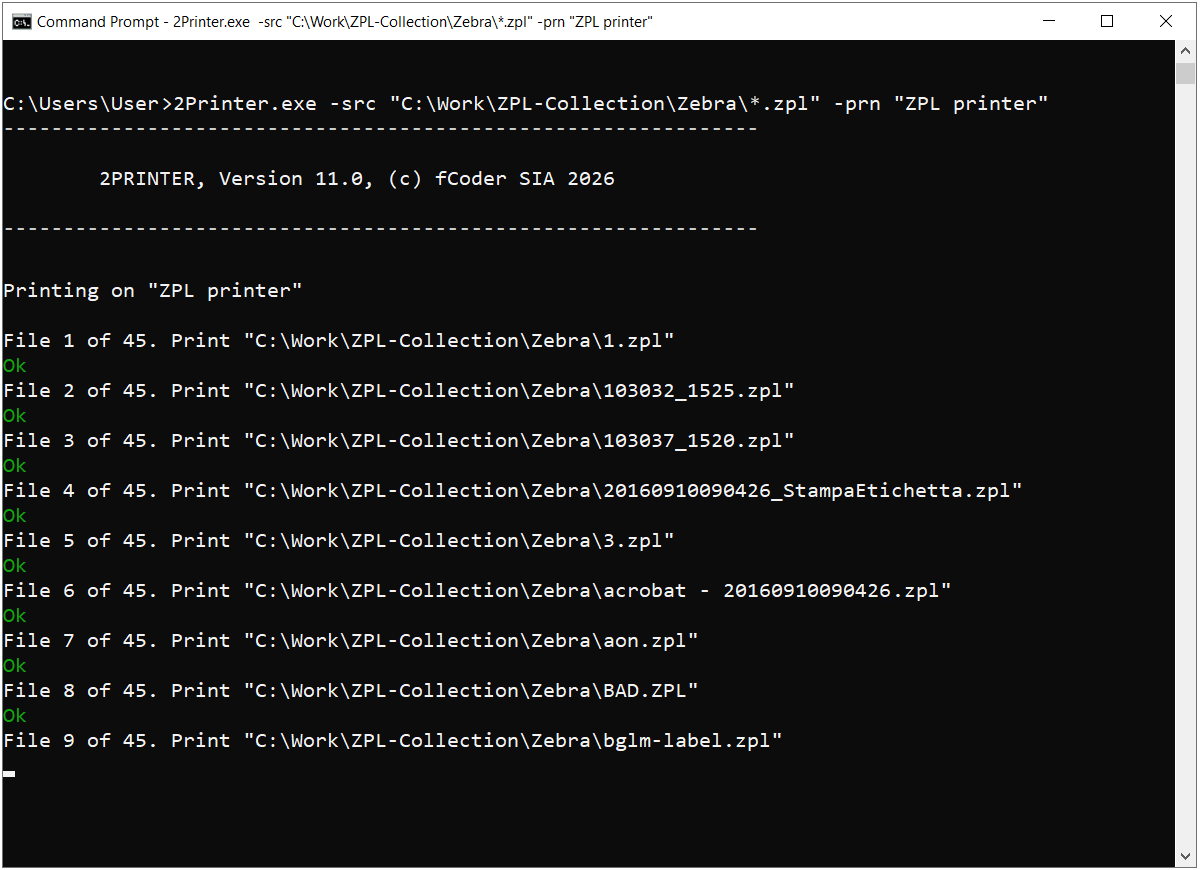
2Printer sends ZPL files to a printer from Command Prompt, PowerShell, scripts, or another command-line interface. Run it on a workstation or server, schedule it, or call it from software that uses printing as one stage of a larger process.
1. Specify the source and printer
Set the path to an individual ZPL file or use a file mask to print a folder, then identify the target printer by its Windows name:
2Printer.exe -src "C:\Input\*.zpl" -prn "Zebra Printer"
The basic command needs only a source folder and printer. Use file masks, scan subfolders, provide several source locations, or load a prepared list. A file list is useful when inputs come from different folders or must be printed in a specific order.
2. Configure the batch print job
Add parameters for the number of copies, page range, paper size, printer tray, duplex mode, color mode, scaling, or other print properties. Settings that you do not specify use the current printing preferences.
3. Keep the batch in the required order
Enable Single print job mode when the files must reach the printer in a strict sequence. 2Printer sends them as one batch, reducing the risk that the Windows spooler or jobs from other users will interrupt the defined order.
4. Reuse or automate the command
Place the tested command in a BAT, CMD, PowerShell, or VBScript file. Run it through Windows Task Scheduler, call it from your own application, or use post-processing rules to copy, move, or delete files after printing.
2Printer works with local, network, and virtual printers available in Windows. It can also print ZPL alongside PDFs, office documents, images, drawings, and other supported formats, allowing one script to handle a mixed document package.
Why choose 2Printer for ZPLChoose it when printing should be launched and configured by a command, scheduled task, script, or application rather than by a user working in a graphical interface.
Command Line Converters
2PDF, 2JPEG, and 2TIFF use the same basic workflow: pass one ZPL file or a group of files to a command, choose an output folder and any required format settings, then run the command manually, from a script, through Windows Task Scheduler, or from another application.
File masks, multiple source paths, subfolders, and ordered file lists make the same approach suitable for both one-off conversions and repeatable batch jobs. The main choice is the required output format.
2PDF — convert ZPL to PDF
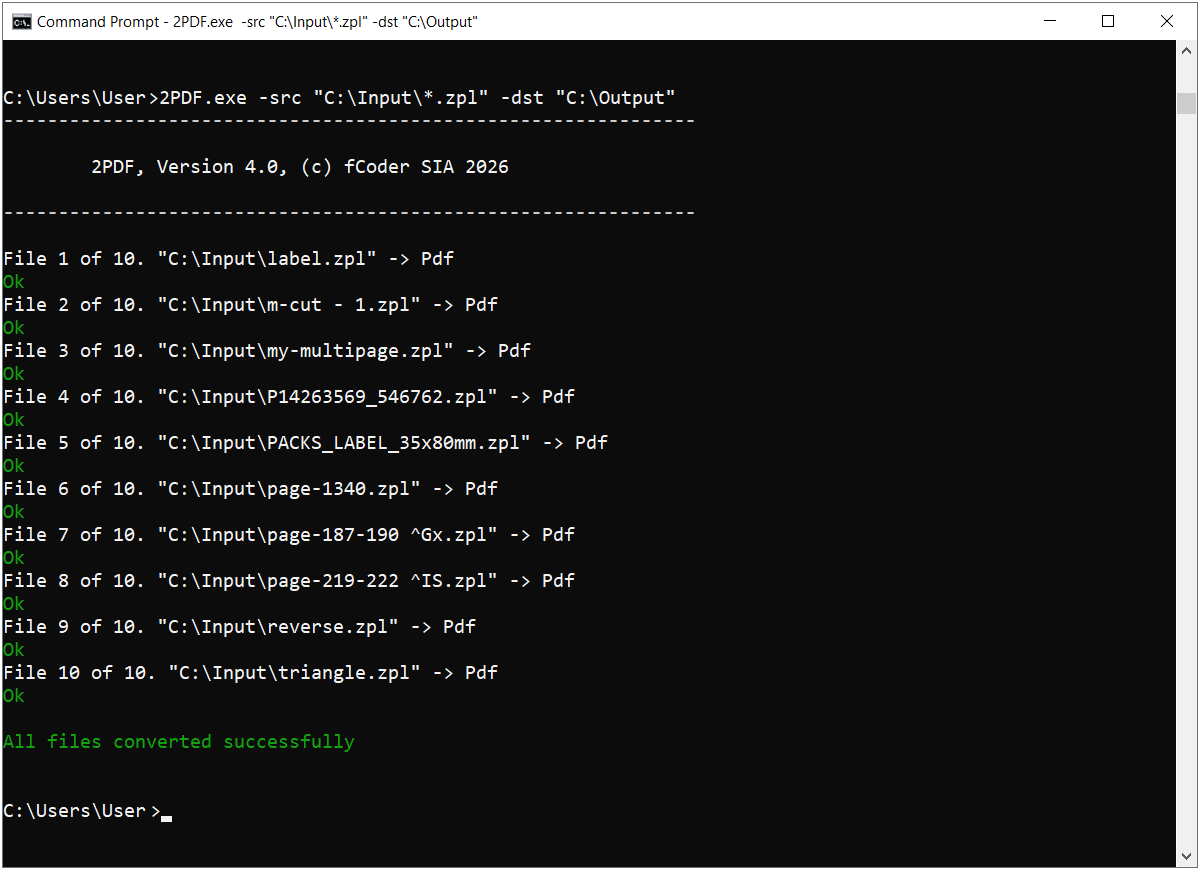
Use 2PDF when PDF is the required output. It can create a separate PDF for each input file, combine multiple inputs into one multipage PDF, or split multipage documents into individual pages or smaller groups. Optional parameters control page selection, output filenames, rotation, document dimensions, and other PDF properties.
2JPEG — convert ZPL to JPEG
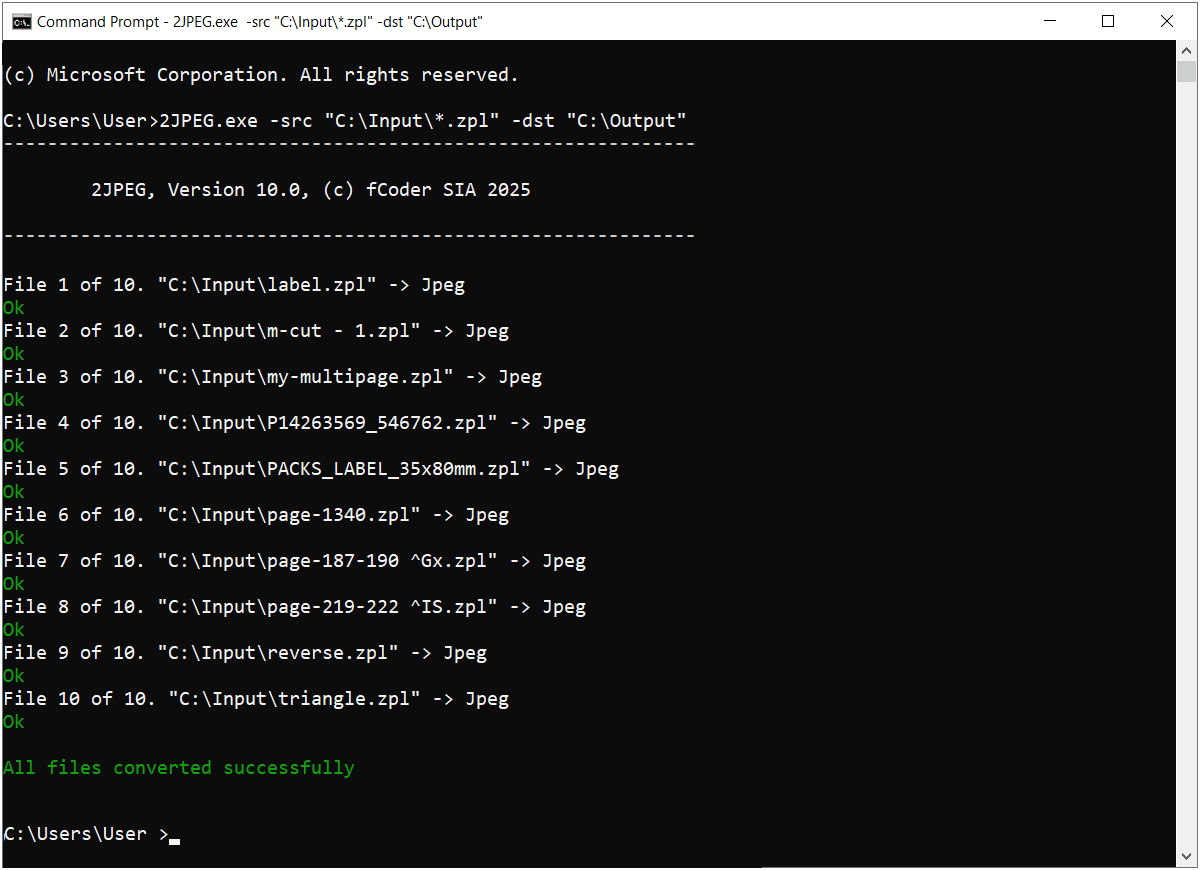
Use 2JPEG when the receiving system needs JPEG images. The command can control image quality, compression mode, color depth, and resolution, as well as resize, crop, rotate, flip, sharpen, watermark, or limit conversion to selected pages.
2TIFF — convert ZPL to TIFF
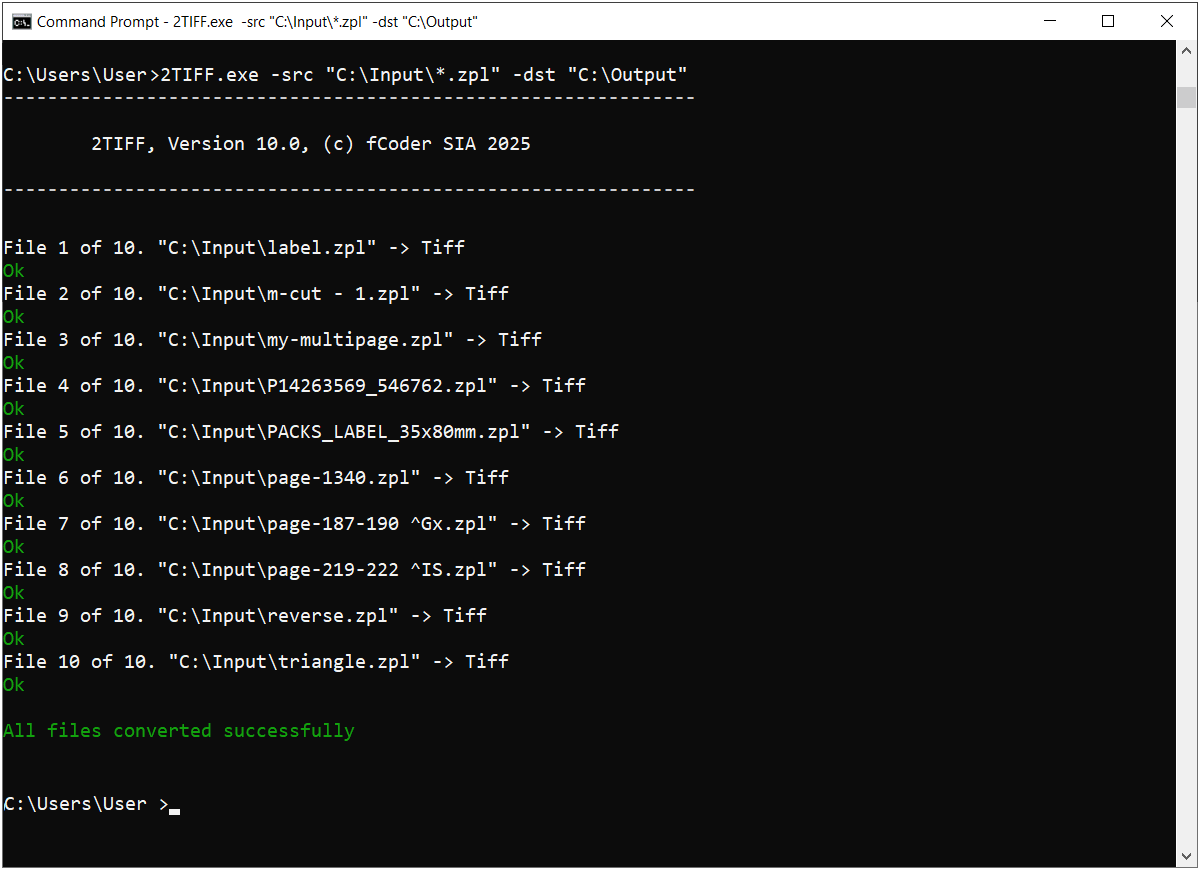
Use 2TIFF when TIFF is required for document-management, archiving, or multipage raster workflows. Choose compression, color depth, resolution, and output filenames; keep pages separate or combine them into a multipage TIFF. Image-processing options include resizing, cropping, rotation, flipping, sharpening, grayscale conversion, watermarks, and page ranges.
All three products have trial versions for evaluation. Commercial, site, and developer licensing options depend on the product and intended use.
Why choose a command line converter for ZPLChoose one when conversion should be repeatable, scriptable, schedulable, or callable from other software, then select the product by the output format you need.
fCoder ZPL rendering engine — integrate ZPL into your software
The applications above provide ready-to-use ZPL workflows. The fCoder ZPL rendering engine addresses a different requirement: adding ZPL rendering directly to your own product or internal system, without requiring users to work through a separate desktop application.
fCoder develops the rendering engine used in its ZPL-capable products. The company can evaluate its use when a software vendor, system integrator, or internal development team needs to produce rendered label output as part of a larger application or document workflow.
Before evaluation, the fCoder team will need to understand where the ZPL comes from, which output formats your application requires, where the engine will run, the expected processing volume, and how errors should be handled. Rendering scope also matters: the engine focuses on ZPL commands that affect the visual label output. Printer-control and other device-specific behavior should be discussed separately.
Licensing depends on how the engine will be deployed. Internal or server-side use and distribution as part of a third-party product are different cases. If you plan to include the engine in software distributed to customers, ask whether a Developer License applies. Another integration or licensing arrangement may be more appropriate for an internal deployment.
When contacting fCoder, briefly describe the ZPL input, required output, target environment, expected volume, and whether the solution will remain within one organization or be distributed with another product. This will give the team enough context to assess both the technical fit and the appropriate licensing model.
Please submit your workflow through fCoder Contacts to discuss the integration requirements and possible next steps.
Why choose the fCoder integration pathChoose it when you are building software and need rendering capability inside that software, rather than an application operated separately by an end user.
Still not sure which ZPL tool fits your workflow?
Use the selector for a quick recommendation. If your process does not fit a standard path, describe how files arrive, what should happen to them, and whether a person, script, or file event starts the job.